5306008103769
Price Quote Get an up to date pricing and availability quote for this product. Order online or over the phone.
Quality Commitment
Serving our customers with quality and safety first.
- AS9120 Certified
- Audited supply chain
- ITAR Registered
- DDTC Registered
- HAZMAT Certified
- Customer service objectives
- Every product 100% inspected

5306-00-810-3769 Specification Set by the OEM (see RNCC code 3)
3a
RIGHT-Hand
0.922in. and 1.001in. ⁓1-1/64"
7.500in. and 7.547in. ⁓7-35/64"
hexagon
0.328in. and 0.360in. ⁓3/8"
0.928in. and 0.940in.
0.070in. ⁓5/64"
0.6234in. and 0.6240in.
0.141in. first hole
0.625in. ⁓5/8"
6.546in. and 6.578in.
1
drilled
18
125000 pounds per square inch
26.0 rockwell c and 32.0 rockwell c
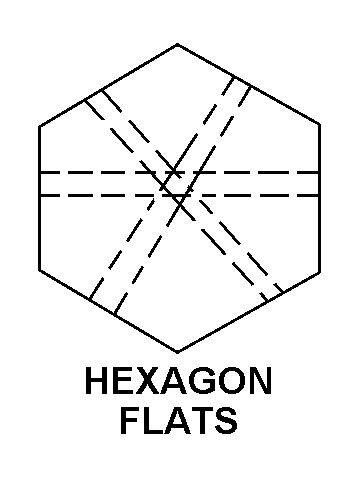
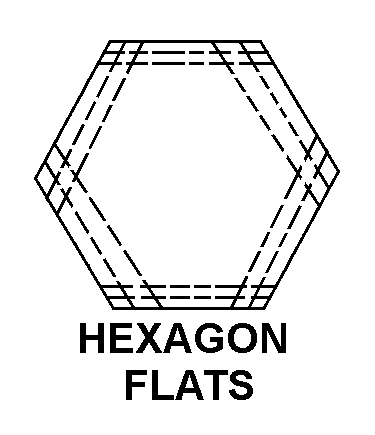
hexagon flats
7.296in. first hole
32.0 microinches threads
steel comp 8740 or steel comp 8630 or steel comp 8735 or steel comp 4140 or steel comp 4130 or steel comp 4037
MIL-S-6049 mil spec 1st material response or MIL-S-6050 mil spec 2nd material response or MIL-S-6098 mil spec 3rd material response or MIL-S-5626 mil spec 4th material response or MIL-S-6758 mil spec 5th material response or ams 6300 assn std 6th material response
cadmium and chromate
QQ-P-416 ty 2 cl 3 fed spec all treatment responses
unf
Cross Reference Parts Part numbers that meet the specification outlined on this page and set by the OEM
Identification Item Identification Guide (IIG) and Item Name Code (INC)


Definition Definition of approved item name (AIN): "BOLT,CLOSE TOLERANCE"
An externally threaded fastener whose unthreaded portion is of a specified grip length, plated or unplated, and is machined to a tolerance of one thousandth (0.001) of an inch (0.025 mm) or less of a specific diameter for items one inch (25 mm) or less in diameter. Items over one inch (25 mm) in diameter shall have a tolerance of fifteen ten-thousandths (0.0015) of an inch (0.038 mm) or less. The nominal major diameter of the threads shall be at least one thousandth (0.001) of an inch (0.025 mm) below the minimum shank diameter, but not below the minimum major diameter for applicable class of fit, as shown in the screw thread standards, fed std h28 and/or other nationally recognized standards. The head is not designed to be held or driven with an inserted driver, nor is it designed for rotation by the thumb and fingers. A locking feature may be incorporated in the design of the head or threads. For items having close tolerance, and fabricated from material having 160,000 pounds per square inch (1100 megapascals) minimum tensile strength, see bolt, shear. For items fabricated from material having less than 160,000 pounds per square inch (1100 megapascals) minimum tensile strength and not having a close tolerance, see bolt, machine.
Packaging & Dimensions Packaging instructions, special markings, and approx. weight/dims
Packing shall be accomplished to meet the performance test requirements of astm-d4169, distribution cycle 18, assurance level 1.
Packing shall be accomplished in accordance with table c.ii for the packing level specified. closure, sealing and reinforcement shall be in accordance with the appropriate shipping container specification.
Options can be exercised as to specific method of preservation or dod approved packaging materials to be used. however, basic preservation method shall be retained, supplemental data shall be complied with, and unit package dimensions shall not be increased by more than one inch. equal or better protection shall be given the item and there shall be no increase in the package cost.
No special marking.
Packaging Codes
OPI: Optional Procedure Indicator Code. A one position alpha code that indicates the allowable deviations from the prescribed requirements.
SPI No.: Special packaging instructions number.
LVL A/B/C: Indicates the type of shipping container required for level A, B, or C maximum packing protection.
SPC Mkg: A two position code that identifies the special markings applied to the container, which is part of the total pack to protect the contained item during preservation, packing, storage, transit and removal from the pack.
5306-00-810-3769 Material Hazmat, Precious Metals, Criticality, Enviroment, and ESD
Indicates there is no data in the hmirs and the nsn is in a fsc not generally suspected of containing hazardous materials.
Precious metal content is unknown
The item does not have a nuclear hardened feature or any other critical feature such as tolerance, fit restriction or application.
Identification Codes
HMIC: Hazardous Material Indicator Code. A one position code that identifies a hazardous item.
PMIC: Precious Metal Indicator Code. A one position code which identifies items that have precious metals as part of their content. precious metals are those metals generally considered to be uncommon, highly valuable, and relatively superior in certain properties such as resistance to corrosion and electrical conductivity.
ESD: Electrostatic Discharge. Indicates if an item is susceptible to electrostatic discharge or electromagnetic interference damage. electrostatic discharge damage occurs when an accumulation of static electricity generated by the relative motion or separation of materials is released to another item by direct contact. electromagnetic interference damage occurs when an item comes into proximity with an electrostatic or magnetic field.
ENAC: Enviromental Attribute Code. Identifies items with environmentally preferred characteristics.
CRITL: Criticality Indicator Code. Indicates an item is technically critical by tolerance, fit, application, nuclear hardness properties, or other characteristics.


